
Slide Scanner Workflow
Goal: Create workflow for using Olympus V200 slide scanner at Brown
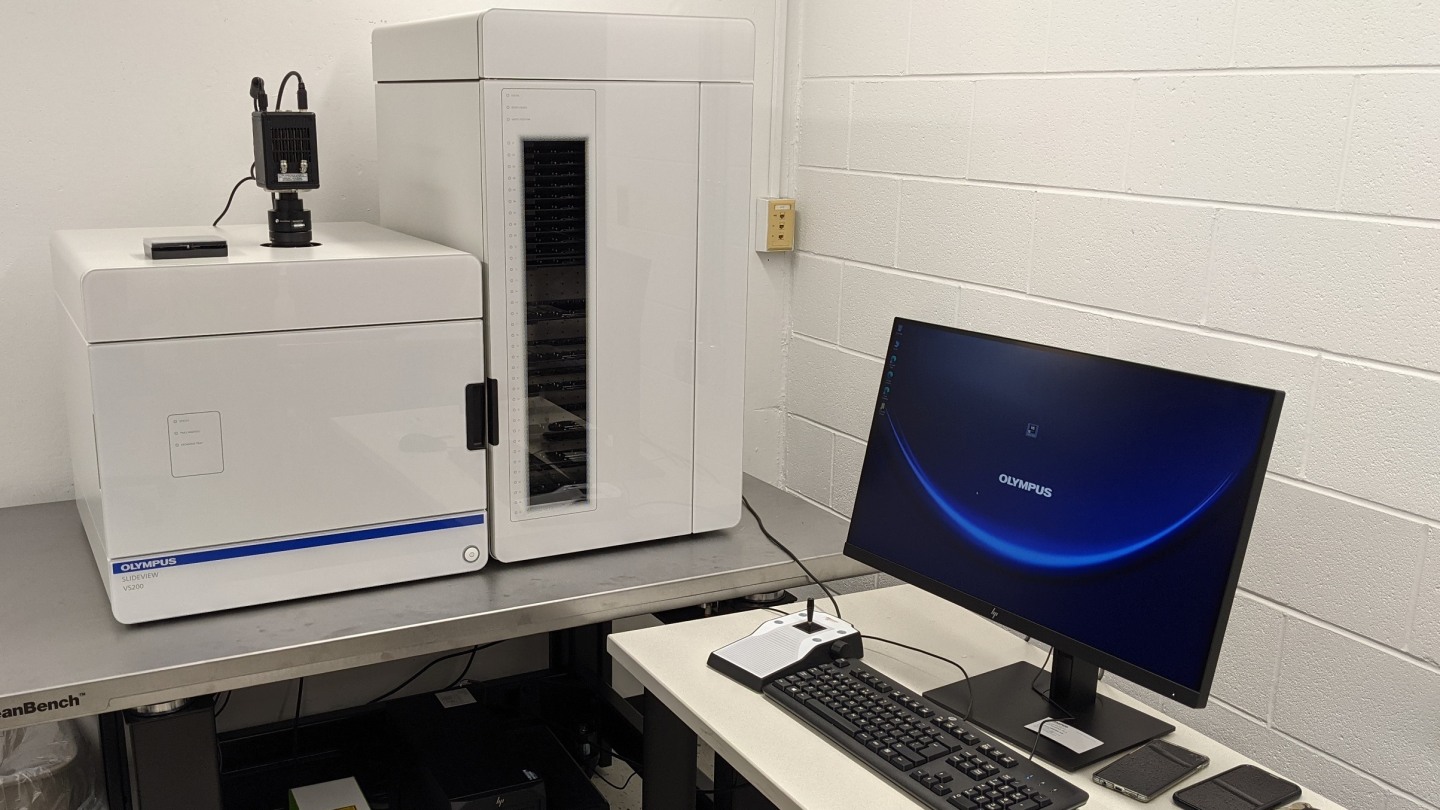
The Olympus VS200 Slide Scanner is located at Brown University. It is an automated slide scanner for imaging H&E slides. This system is ideally suited for imaging a large field of view at high resolution.
Before:
- Contact Geoff Williams (manager of the facility) to see if the scanner is available, as well as set up payment methods and other logistics (cc Hollie on these emails).
- Schedule a time to complete slide scanner training with Geoff - this needs to be done before using the slide scanner independently.
- Slide scanner is in Sidney Frank Hall for Life Sciences, BioMedCenter, room BMC 005. Building & slide scanner room require swipe access w/ Brown ID.
- Get a temporary Brown ID (talk to Geoff) or have one of the Brown researchers let you in (which is a little annoying, I would just try to get the ID).
- Make account and sign up for slide scanner sessions on iLabs. You need to make an account so that you can start/end your sessions when working with the slide scanner. To make a reservation:
- After making an account, click log in on top right corner.
- It will ask you if you are not a Brown University user. Check the box next to Login using iLab credentials.
- enter username and password.
- Click on the 3 horizontal lines in the top left corner and click core facilities.
- This will take you to a page saying ‘There are no cores associated with this selection. Click here to view cores at other institutions.’ URI doesn’t have any cores associated with this platform. Click ‘here’ to see the cores at other institutions
- A lot of different core options will come up. To find Brown, search the table for Brown using top right search bar.
- You will see Brown University and under that ‘Bioimaging Facility’. Click on that.
- This will take you to the equipment reservation page for the Brown Bioimaging Facility. To find the slide scanner, click the SFH Fluorescence drop down option.
- You will now see the Olympus VS200 Slide Scanner option. Click on that.
- This will take you to the slide scanner schedule. To make a reservation, find your desired date and time and double click in the calender. A box will pop up that allows you to make a reservation.
- Under reservation details, it should say: self use $42.00/hr (trained), Lab: Putnam, Hollie (URI) lab. In event notes, add your name, the names of anyone that will be with you, and URI. - Under Times: choose a start and end date. You can always change or delete the reservation, if needed. - Under Use and cost of reservation: it will tell you the hourly rate that will be charged to us for using the slide scanner. The rate for external researchers is $42/hr. - Under Payment information: Enter Lab PI name (Hollie Putnam). - Click save reservation.
- Get a hard drive, preferably one that has >1TB storage. These files are really big (about 2MB per slide).
- Organize slides beforehand and make a plan about which ones you will scan during your session.
During
Turning on
- Turn on/log on to computer (labeled 1)
- you should get a username and password when training with Geoff. MAKE SURE YOU KNOW THIS!!!!!!! Or else you will get to the facility and be unable to log in to the computer and access the slide scanner software.
- Ask Jill for computer log-in information or open this document
- Turn on Olympus Slideview VS200 (labeled 2)
- Turn on camera, the switch is on top of slide scanner (labeled 3)
- Turn on X-cite Xylis, next to computer under table (labeled 4)
- Check there is green light lit up next to each tray in slide loader. If not, open door and properly align trays before starting software.
- Start kiosk session in iLabs (use personal computer)
- Log on to iLabs
- Click on the 3 horizontal lines in the top left corner and click ‘My Reservations’.
- Reservation information will come up. Click on the Kiosk key under the reservation name.
- The Kiosk key will open a page that has all the reservation information on it. It also has START in the upper right hand corner. Click START once you are ready to begin working. This will time us for how long we use the scanner and then charge us accordingly.
- Leave this window open on your laptop.
- Plug in the hard drive to the computer via USB cable.
- Start Olympus VS200 ASW software
Loading slides
- Once the software, opens, click on Expert Batch
- Click Exchange Trays in the top left hand corner. The door should unlock. When the door unlocks, you should hear a click and the green light at the top left hand side of the door should turn off.
- Open the door
- The trays are in slots in the scanner. If a tray is in a specific slot, a green light will turn on next to each tray, indicating that the scanner knows that there is a tray there. Check to make sure all trays have a green light next to them. If they do not, remove the tray and put it back in until the light turns green.
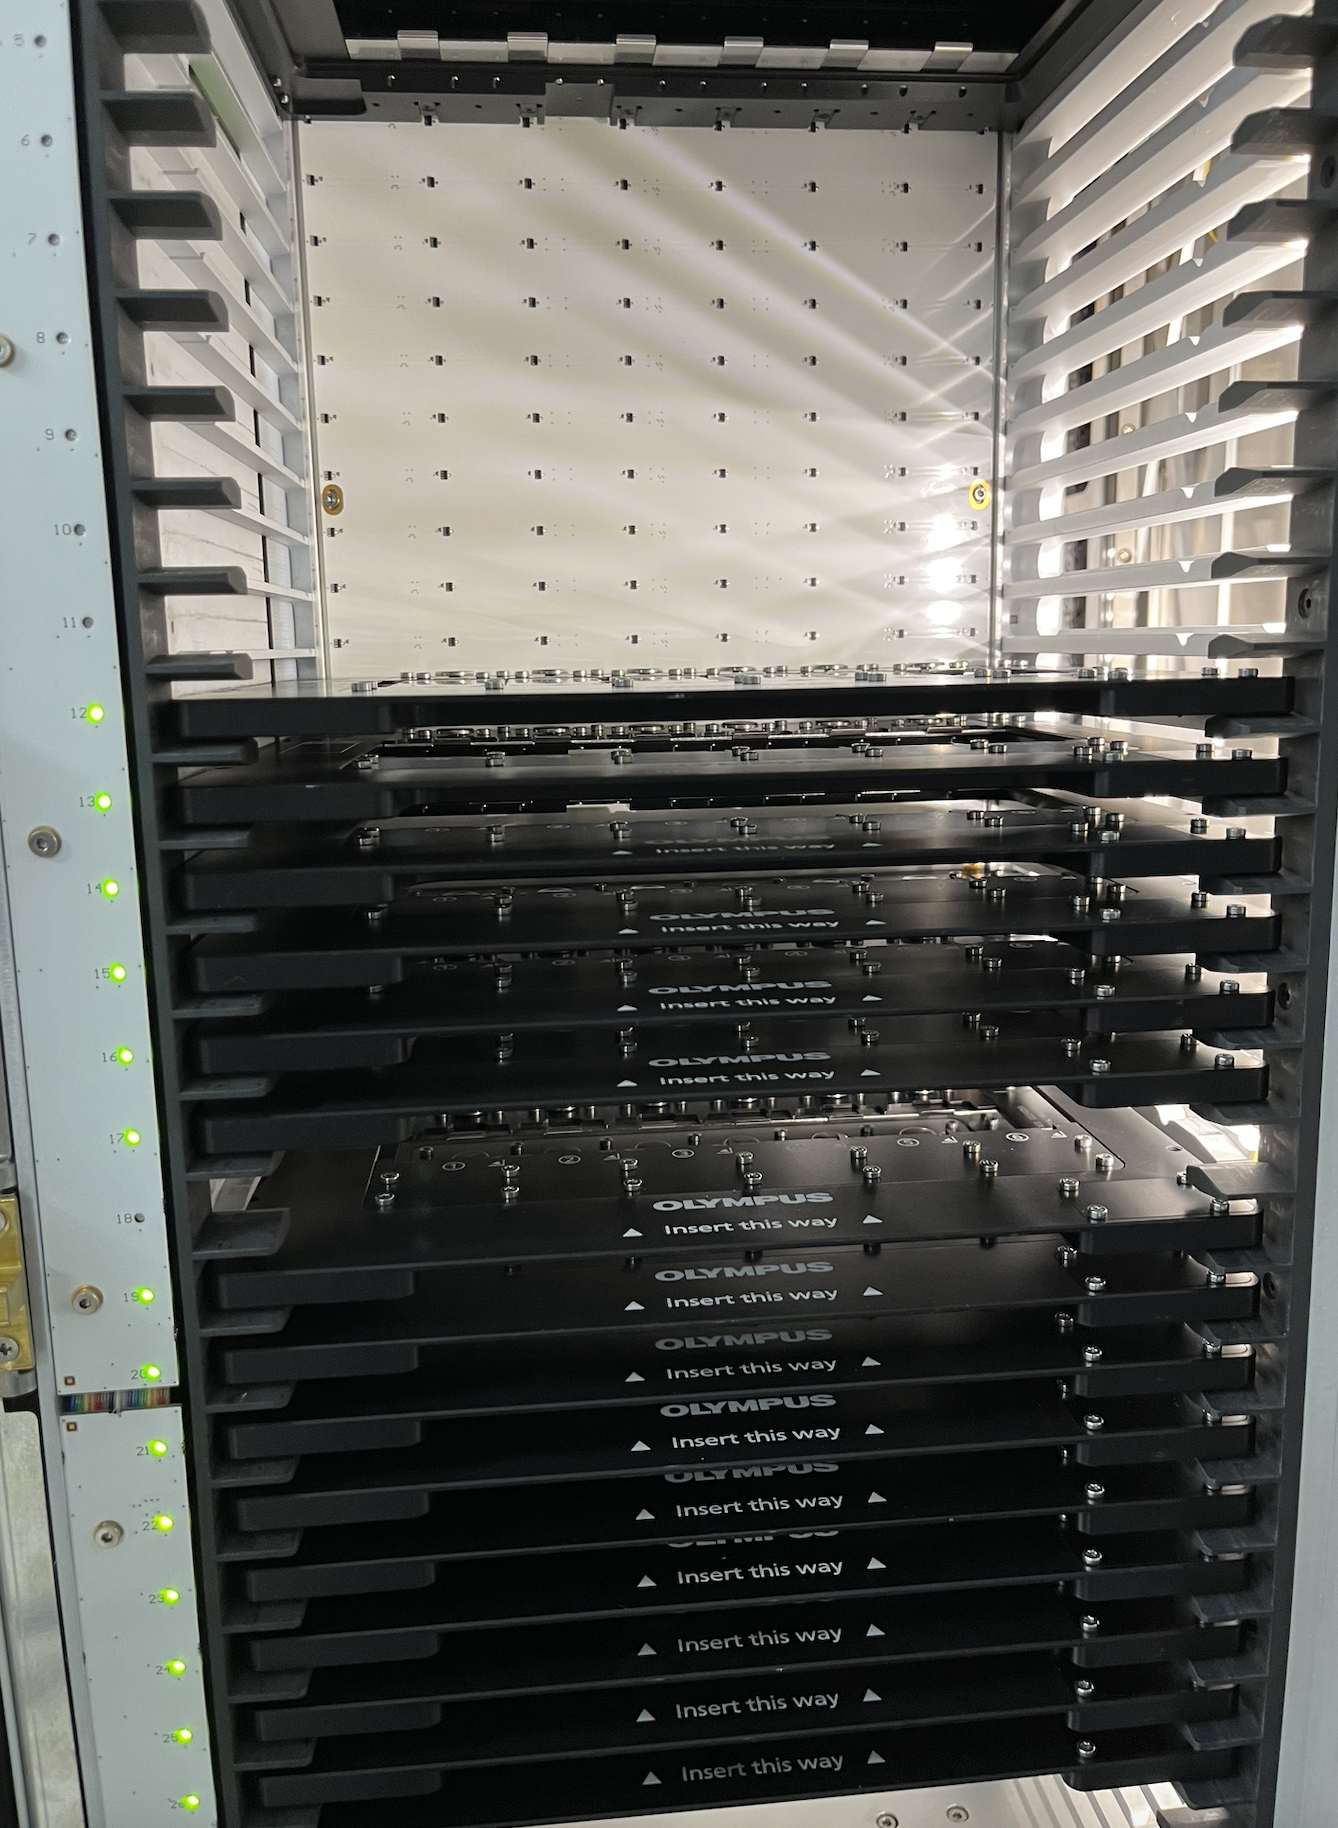
- There should be 15 trays inside and each holds up to 6 slides. The scanner can do up to 90 slides during a session. Calculate how many trays needed for your scanning project.
- Remove one tray and place it on the table. Do not remove them all at once, there isn’t enough table space to hold all of the trays.
![]()
- The tray is labeled with how to orient the slide in the tray and which way to insert the tray back into the slot.
- Load slides onto the tray
- The slide slots are labeled on the tray. Start with slide slot 1
- Slide back the silver knob at the top of the tray so that the silver arm also slides back.
- Put your slide in that slide slot, making sure the label is oriented the correct way.
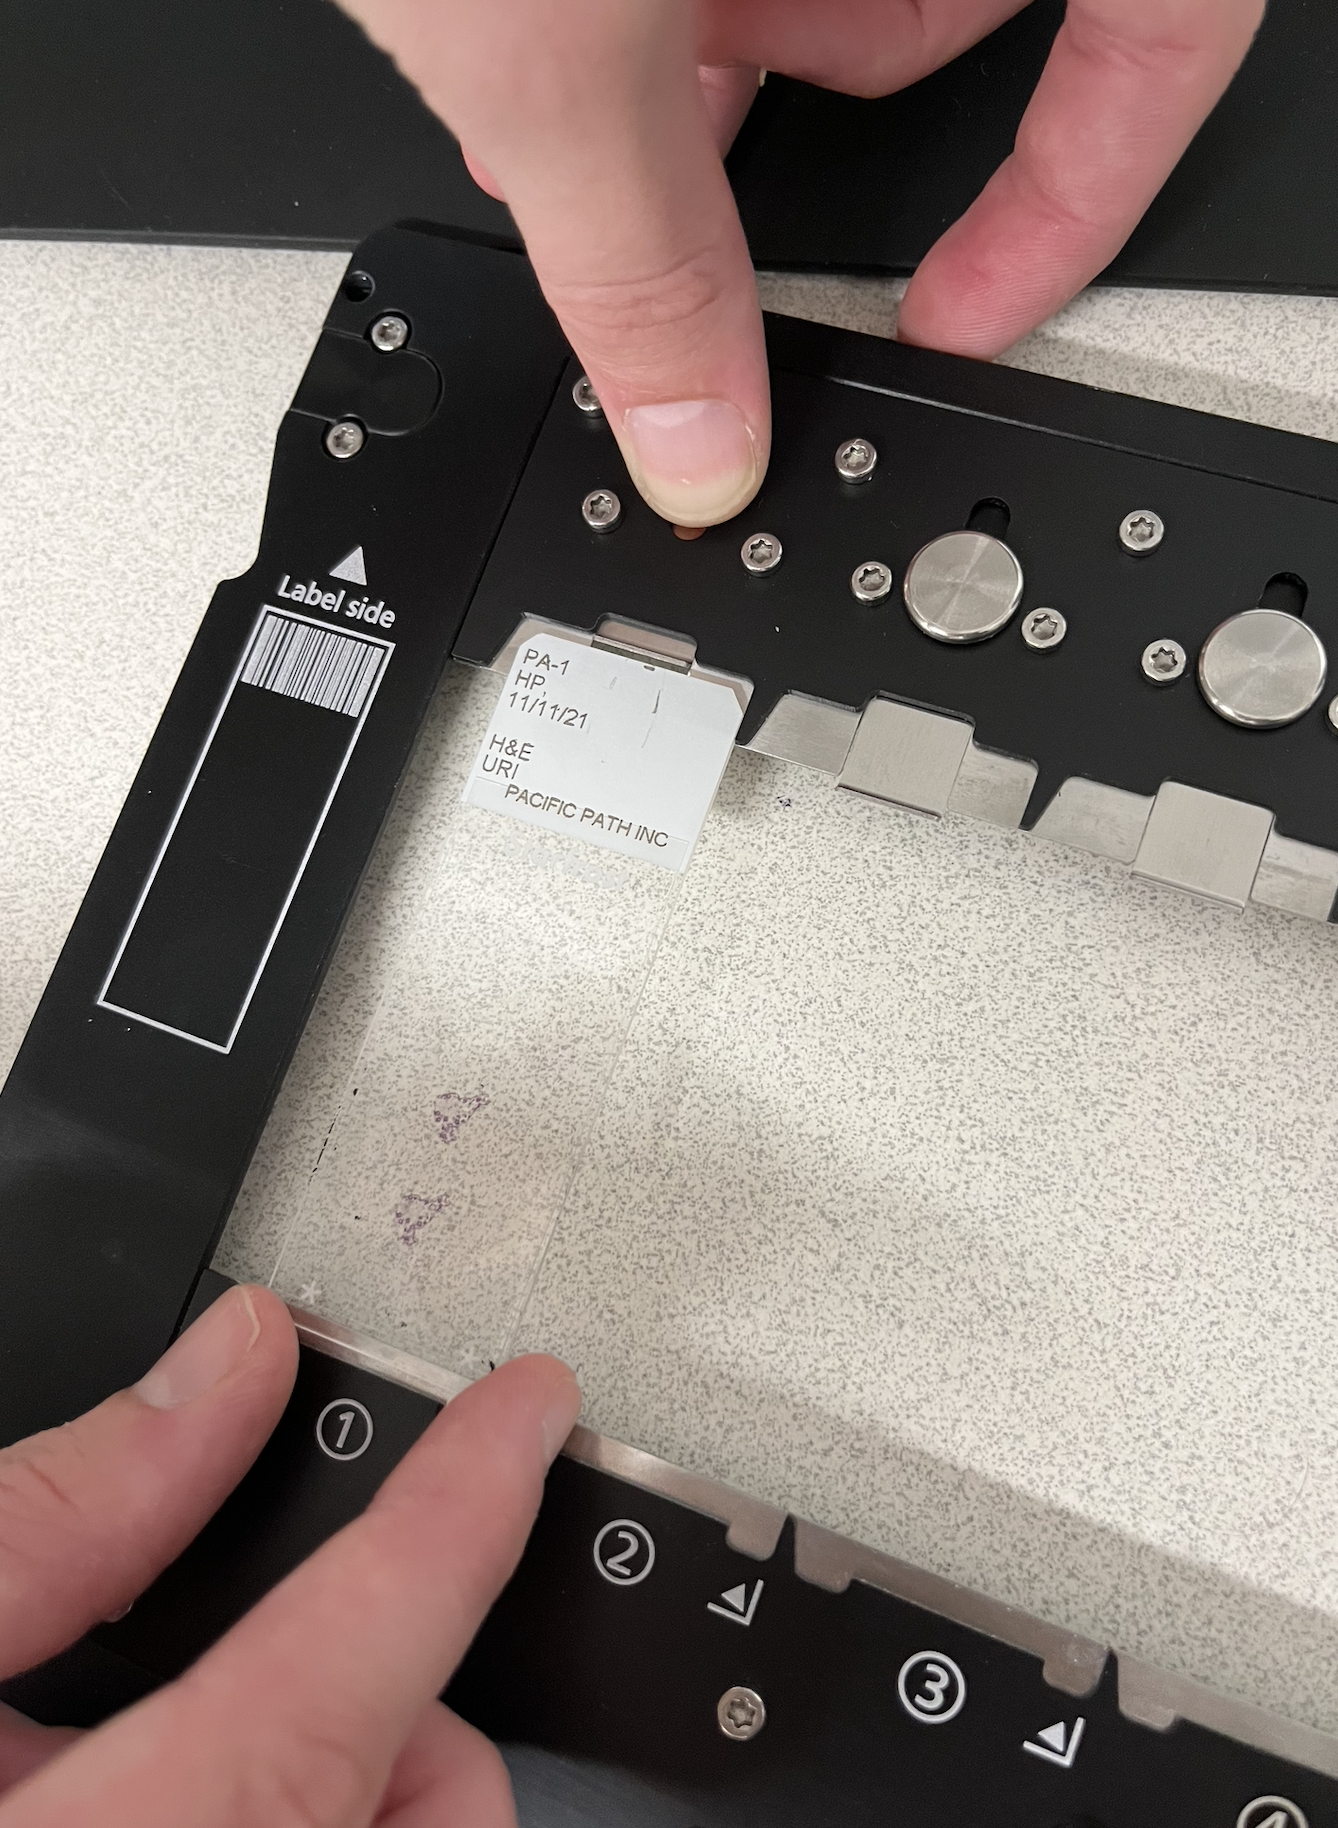
- Slide the knob back down so that the silver arm secures the slide in place
- Carefully push the slide as far as it can go to the right so that the bottom right corner of the slide is close to the triangle shape (also bottom right corner)
- Repeat for all slides
- Put the tray back in scanner. If the tray is properly sitting in the scanning, a green light will turn on next to the tray. If the green light does not turn on, readjust the tray until it does. It doesn’t matter which slot the tray gets placed in.

- Repeat this for all trays/slides.
- Close the door. All trays should have green light next to them
- Click lock door at the bottom right of the screen
- The software should recognize how many trays have slides on them and the number of slides on each tray. On the screen, trays with slides on them will show up on the screen as white bars next to each numbered slot. Check to make sure the scanner is recognizing all trays and all slides. If it is not, adjust slide/tray and try again. Make sure it recognizes all trays and slides before proceeding

Scanning
There are lots of different scanning settings for this software. Read the manual beforehand to decide what settings would be best for your specific project.
- After the slides are loaded, you should be in the Scan Project tab (see tabs in the top right hand of screen). Click on Gallery (top left of screen). Click Select All (top left, a bit to the middle) to scan all slides
- Click on the Overview (top right hand corner) tab.
- On the right hand side of the screen is a list of options with a + sign next to them. Click on Project Scanning
- This will take you to a screen where you can create a new project. I make a new project each time I use the slide scanner. Name the new project the date. Click Save.
- more info here details here about selecting magnitude (10x, 20x, 40x).
- In the Detail tab, click Scan Overview to do initial scan of all slides. It should be about 40 frames per slide. This will take a few minutes, depending on how many slides you have.
- After the initial scan is complete, click a single slide in one of the tray so that the area around the slide is highlighted blue.
- Go back to the Overview tab
- From the right hand side options, click on Name and Saving
- Click the wheel to the far right of the image name. A box will come up for naming the slides. The list on the left hand side are possible identifiers to include in your naming of the slide/file. The list on the right side are the identifiers that will be used for file naming. Use the Add and Remove buttons located in between the two lists to add/remove specific identifiers.
- To add a custom identifier, click Add Text in the bottom left corner. Type your identifier (sample ID, timepoint, etc) and click save. Scroll down to the bottom of the list on the left, select your custom identifier and add it to the name.
- I usually remove all identifiers and just put my custom identifier. ‘Counter’ cannot be removed from the name for whatever reason, but that’s okay.
- Click Save
- Under Directory, click the wheel to the far right of the directory name. Save the files directly onto your hard drive or into the ‘jillashey’ shortcut folder on the computer desktop.
- Click the option Scan.
-
- Click scan. For scan area creation, select one for each subsample. This will make focus boxes around the important parts of the slide. If needed, you can move the boxes around, make them larger/smaller, or add/delete boxes more detail on Scan Areas
- Go back to Gallery and repeat the naming and scan area process for all slides. Click on them one at a time.
- It’s tedious to do this for all your slides, but the slide scanner is going to save you significantly more time in the long run :)
- Once all slides are named and the scan areas are created, click start scan
- Slides are now scanning! It will take a few mins per slide

Shutting down
- After all slides have successfully scanned, check to make sure everything is SAVED to your hard drive. If you do not have a hard drive and/or don’t have many slide scans, move the files into your Google Drive. DO NOT leave anything saved on the slide scanner computer.
- End Kiosk session in iLabs
- If someone else is signed up after you on the slide scanner (this can be checked on iLabs):
- Log off computer
- Fill out logbook (next to computer)
- If you are the last person for the day:
- Shut down computer (either on the screen or labeled 1)
- Turn off X-cite Xylis (labeled 4)
- Turn off camera (labeled 3)
- Turn off slide scanner (labeled 2)
- Fill out logbook
Location of scanner
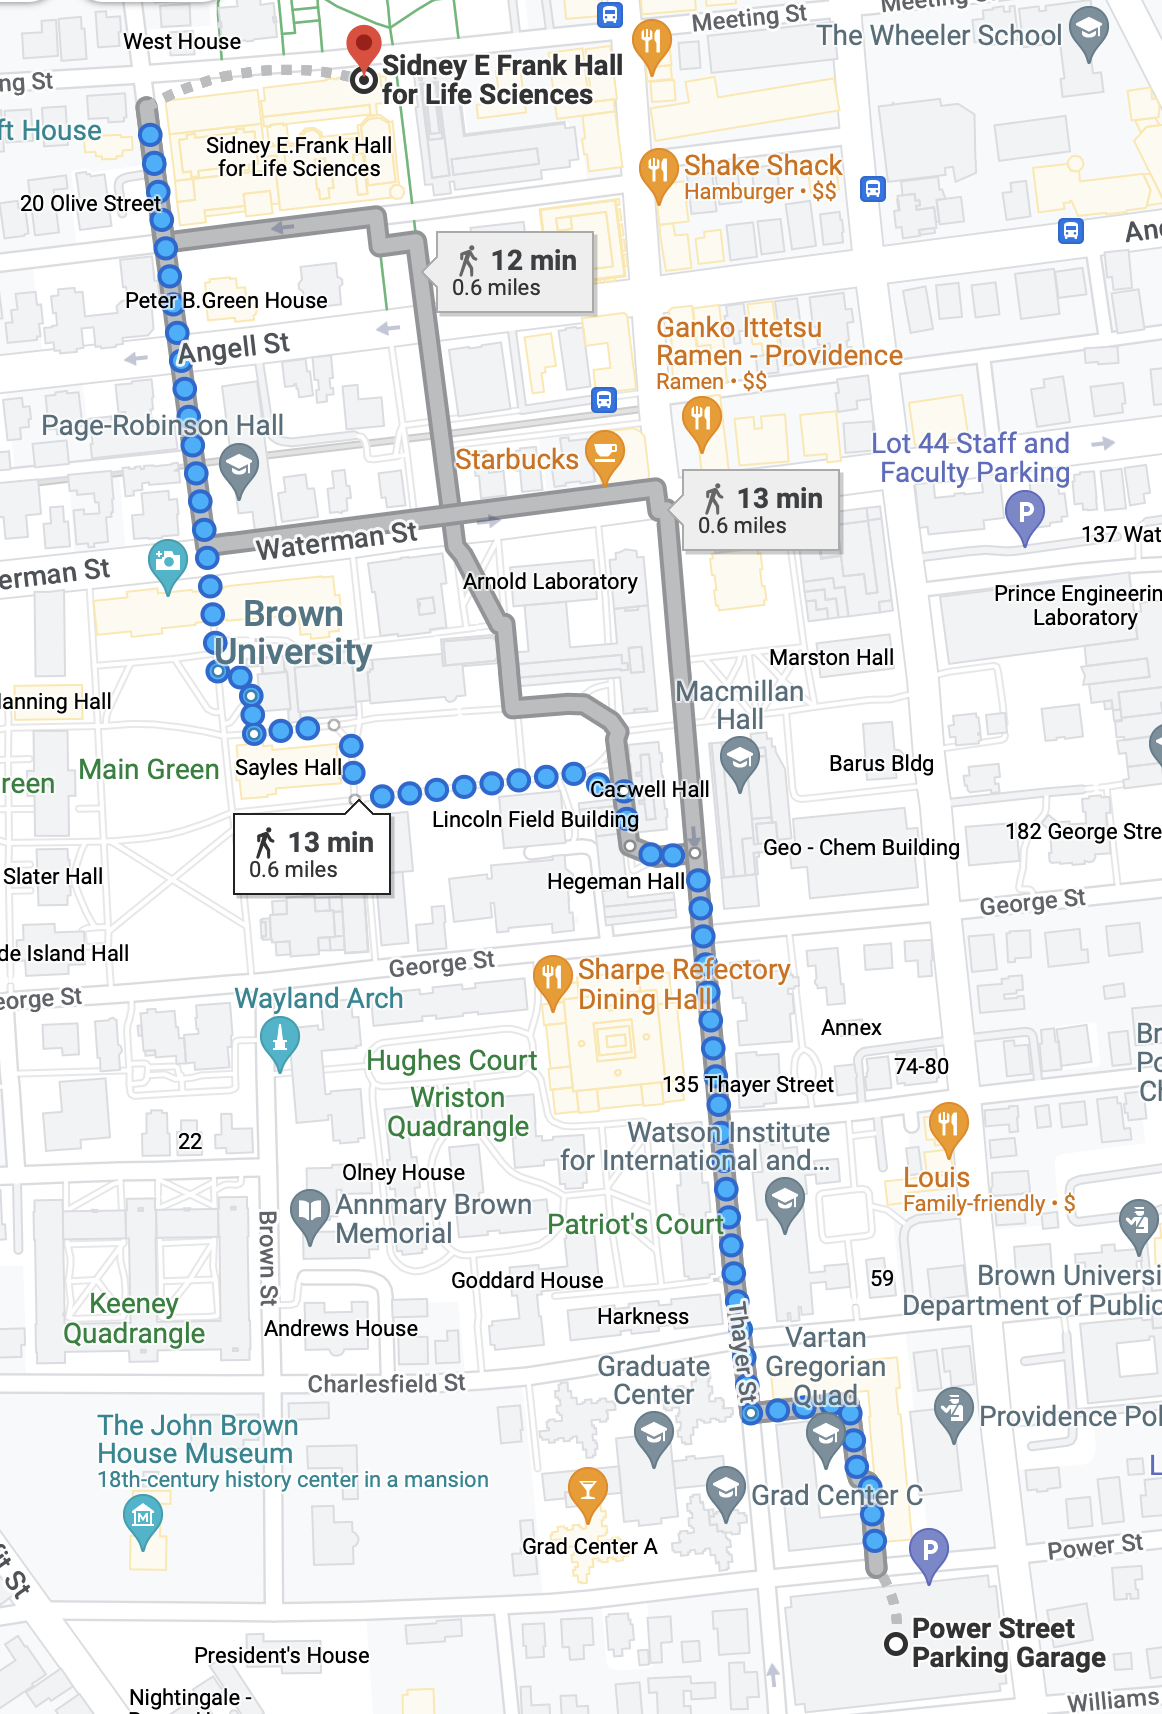
The scanner is located in Sidney Frank Hall for Life Sciences, BioMedCenter, room BMC 005 at Brown University in Providence, RI. Both the building and the slide scanner room require Brown ID swipe access. Either ask Jill for her ID or ask Geoff if he can open the doors for you.
Parking!!!
I am a very anxious parker, so here is some parking info:
- Brown has visitor parking (111 Power St, Providence) in Power Street Parking Garage. If you park here, you have to pay ($3/hr) and put the ticket on your car’s windshield. It’s ~15 min walk from the parking garage to the building (map below).
- There is also metered parking in and around Brown campus, but it can be tricky to find.
Written on March 22, 2022